
A legacy of innovation, quality, and culinary experience.
Read our Newsletter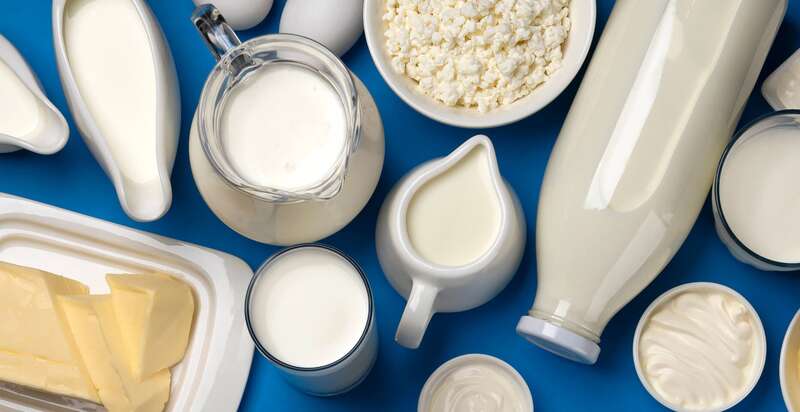
A legacy of innovation, quality, and culinary experience.
Read our Newsletter


Learn how to make whipping cream from milk and butter at home using simple steps. Perfect for desserts, coffee, and quick recipes, no heavy cream needed.
Imagine you’re halfway through baking a cake or brewing a rich cup of coffee and realize you’ve run out of whipping cream. Heading to the store isn’t always an option, but don’t worry. With just two everyday ingredients, milk and butter, you can whip up a homemade version of this creamy essential right in your kitchen.
Whether you're a home baker, a coffee enthusiast, or just someone who enjoys creamy desserts, learning how to make whipping cream at home is a game-changer. It's cost-effective, customizable, and works beautifully in most recipes, from a classic mayonnaise base for dressings to enhancing a creamy peanut butter dessert.
In this blog, we’ll explore everything you need to know: the science behind it, step-by-step instructions, tips for whipping, troubleshooting advice, variations, and best usage cases, from adding richness to your favorite BBQ sauces to crafting silky smooth ganache.
Traditional whipping cream (also called heavy cream or double cream, depending on the region) has a high-fat content, usually between 30% to 36%. This high fat allows it to whip into a fluffy texture and hold shape, making it perfect for toppings and fillings.
Milk, especially whole milk, has only about 3–4% fat. On its own, it’s not enough. However, when you add melted butter, which is nearly 80% fat, you can emulate the fat content of heavy cream. The key is emulsification, getting the fat from the butter to fully combine with the milk so the mixture behaves like cream.
Fun Fact: The emulsification process replicates what happens during the commercial production of cream, just at a smaller scale.
To create your own whipping cream substitute, all you need is whole milk and unsalted butter. These two ingredients work together to raise the fat content to a similar level as store-bought cream. Whole milk serves as the base with a small amount of fat, while the butter supplies the majority of the richness. When blended properly, they form a smooth, creamy mixture. This combination is not only budget-friendly but also customizable, allowing you to control the quality and flavor based on your recipe’s needs.
Whole Milk 2/3 cup (Base liquid with natural milk fats)
Unsalted Butter 1/3 cup (Boosts fat content to mimic real cream)
You’ll get roughly 1 cup of cream-like liquid from this mixture. This quantity is ideal for replacing whipping cream in recipes like ganache, soups, baked goods, and sauces. It can also add a silky texture to mushroom slices sautéed in butter or smooth out a sauce made with golden corn kernels.
Tip: Always use unsalted butter to control the flavor, especially for sweet recipes.
![]()
Making whipping cream at home is a three-step process that’s easy to follow. First, gently melt the butter without letting it brown. This preserves its smooth texture and prevents an overpowering flavor. Second, add the milk to a blender and slowly drizzle in the melted butter while blending to ensure proper emulsification. Finally, chill the mixture for 30–60 minutes to allow it to thicken. This chilled mixture can be used as-is in cooking or whipped lightly for softer peaks. This method is ideal when you're out of store-bought whipping cream and need a quick alternative.
Use a saucepan or microwave to gently melt 1/3 cup of unsalted butter. Make sure it’s fully melted but not bubbling or browned. Let it sit for 1 minute to slightly cool.
Pour 2/3 cup of whole milk into a blender or food processor. Slowly drizzle in the melted butter while blending. Blend for 30 to 60 seconds until fully combined.
Transfer the mixture into a glass container and chill for at least 30–60 minutes. This helps thicken the cream and improve consistency, especially if you plan to use it as a topping or in a dessert that calls for sweet condensed milk as an additional sweetener.
If you're cooking for a crowd or need a larger amount of whipping cream, it’s easy to scale the basic recipe. Simply maintain the same ratio of 2 parts milk to 1 part butter, and multiply according to your needs. For example, for 2 cups of whipping cream, you’ll need 1⅓ cups of whole milk and ⅔ cup of unsalted butter. This method allows you to prepare fresh whipping cream in the exact amount your recipe calls for, reducing waste and keeping ingredients fresh.
Yes, but with conditions. The milk and butter mixture is not as stable as store-bought whipping cream, especially when used alone. You can achieve soft peaks with the help of a stand mixer and by chilling your mixture thoroughly.
Add stabilizers: Use ½ tsp of cornstarch or 1 tsp of powdered sugar.
Use chilled equipment: Cold bowl + cold beaters = better volume.
Beat at medium speed: Don’t rush the process; it takes a few minutes.
If you need thick whipped cream for decorating or frosting, this method works best for light dollops, not stiff peaks. It’s perfect for lightly topping coffee or mixing into a creamy mayonnaise dip with a hint of jalapeno slices for a spicy kick.
If your homemade whipping cream turns out too runny or doesn't blend well, the issue is usually related to temperature or technique. A runny texture often means the mixture wasn’t chilled long enough; cold helps the fats solidify. If it won’t whip, the fat content may be too low or the ingredients too warm. Try adding a pinch of cornstarch and refrigerating before whipping. Separation can happen if the butter was overheated or not properly emulsified. In that case, re-blend the mixture with a spoonful of milk. For the best flavor, always use fresh, unsalted butter.
Fridge: Store in an airtight container for up to 3 days. Shake well before use.
Freezer: Not recommended for whipping, but okay for use in baked or cooked recipes. Separation may occur after thawing.
When comparing the homemade milk-and-butter version to commercial whipping cream, there are clear trade-offs. Homemade cream offers control over ingredients, no preservatives, and cost savings. However, it lacks the stability and long shelf life of store-bought options. While it’s excellent for cooking and adding richness, it may fall short in applications requiring stiff peaks or long-lasting hold. Still, for most recipes, this simple substitute offers a practical and effective solution that’s readily available from your kitchen.
Making whipping cream from milk and butter is a quick fix when you're out of the real thing.
While it won’t whip like heavy cream, it works great in recipes that require richness and creaminess.
With a few add-ins and chilling, it can be adapted for both sweet and savory uses.
Always use whole milk and unsalted butter for the best results. A blender or hand mixer will ensure proper emulsification for a smooth finish.
1. Is whipping cream the same as Chantilly cream?
No, they are not the same, although they are closely related. Whipping cream is simply heavy cream that can be whipped to make whipped cream. Chantilly cream is sweetened whipped cream, often flavored with vanilla. So, Chantilly cream is essentially whipped cream with sugar and vanilla added.
2. How do I make whipped cream at home?
To make whipped cream at home, you need:
1 cup of heavy cream or whipping cream
2 tablespoons of powdered sugar (optional)
1 teaspoon of vanilla extract (optional)
Directions:
Chill a mixing bowl and beaters in the fridge for 10-15 minutes (this helps the cream whip better).
Pour the cold cream into the bowl and begin beating with a hand mixer or stand mixer on medium speed.
Once the cream starts thickening, add sugar and vanilla (if desired).
Continue whipping until soft peaks form. Be careful not to over-whip, or it will turn into butter.
3 What is the difference between whipping cream and cooking cream
Whipping cream has a higher fat content (around 35-40%), which makes it perfect for whipping into stiff peaks. It’s commonly used for desserts and toppings.
Cooking cream, on the other hand, is often a lower-fat cream (around 20-30%) designed for cooking purposes. It’s typically used in savory dishes because it doesn’t whip and stabilize as well as whipping cream.
4. Is whipped cream Dream Whip
No, Dream Whip is a powdered dessert topping mix that is often used as a substitute for whipped cream. You mix it with milk and beat it to form a whipped topping. While it can mimic whipped cream, Dream Whip is not the same as fresh whipped cream since it contains stabilizers and artificial ingredients.
Whipping cream is a staple in many recipes, but you don’t need to rush to the store every time you run out. With just milk and butter, you can recreate a homemade version that’s rich, creamy, and highly versatile. Perfect for emergencies, budget cooking, or simply reducing processed food from your diet.
So the next time you’re whipping up something special, remember: a little butter and milk can go a long way!